Dear Noel,
As a prologue to a post I’ve been trying to write for over two weeks, my life seems to have lurched into overdrive lately 🙂 My to-do lists have exploded all over the place, and the really busy part hasn’t even started yet…it’s still early December! The only time I’ve been able to find some quiet time to think and write has been after midnight, when my brain ain’t so spry.
I must finally admit that I probably won’t be able to reach the bar set with the comprehensiveness of your last post and will have to stick to point form for a lot of this post or risk possibly never getting it written at all. Ever.
I think for my sanity, I’m going to have to keep these posts shorter!! 🙂 🙂 🙂
——————-

Noel, you knocked it out of the park with your last post! I thought it would take weeks of work and posts back and forth to gather all that information…
I’m always excited to reply to you right away….and then life gets in the way, so I’m sorry for this much-later-than-expected post. I kind of knew this would happen…I get overwhelmed easily, especially at this time of year, and things just don’t come together the way I had hoped. With the holidays coming up, I imagine we both might need a bit of leeway, and I’m totally okay with that 🙂 Journey not destination, right??
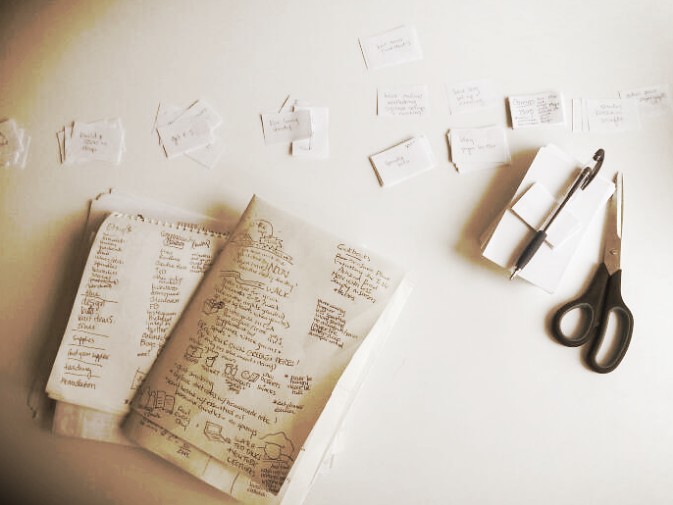
Anywho! Let’s see if I can gather the copious amounts of notes I have into something coherent…..
On learning about superwash…
It’s funny how there are stages of growth as a knitter, and there are times I look back and shake my head at how little I knew–and how little that mattered to me…I just went ahead and knit what I want, whether I was using the right yarn or technique or not! Or, how my life totally changed when I knit with wool for the first time, and then hand-dyed merino and silk for the first time…I still hadn’t even clued in to superwash yet at that point.
But as for learning about, or becoming aware of, superwash, I can’t really recall a specific moment. In fact, I’m not even sure when superwash started becoming a thing. I was surprised to hear your account of it, because I always sort of assumed that it was a permanent fixture in the market, or at least in Korea when I first started knitting. I can’t remember what I thought, but it sounded processed and chemical-ey, so just probably not good for the environment. I bought superwash since that was what was available, but I was still dabbling with all sorts of random natural and unnatural yarns: mystery mill ends and brightly coloured acrylic. (I’ve always been, what do you call it–thrifty? super cheap?) Then I got into dyeing, and spinning, because handdyed yarns and fibres weren’t really available in Korea, and also because I was still poor and thrifty 🙂
I’ll still knit with anything, but I would have to say learning how to spin taught me the most about the properties of wool and other fibres, and the construction and best use of different kinds of yarn. (I just received a bunch of breed samples from a friend, which will teach me even more, I’m sure!) It’s kind of like how learning French and Latin gave me a better understanding of the underpinnings of English vocabulary and grammar–learning how to spin makes me a much better knitter/crocheter. I love the various properties of wool, and superwash sort of turns down the volume on that sort of textural hedonism for me. Not quite as fun for the hands.
Reading through some of the comments on blogs while gathering more “social” information about superwash, you’re not alone in thinking that superwash was “pre-felted.” That seems to be a logical connection that many people have made to fabric or cotton that was “pre-shrunk.”
On different perspectives of superwash…
You say you’re not a scientist or have a doctorate in in textiles, but you definitely have an analytical, detail-oriented eye! Your post gathered all the facts that are so central to this whole discussion, and now I’m curious about the connections and meaning and personal preferences people have with their fibre choices–the social practice side. In fact, this time, I did go back through a lot of the comments on all those links I shared last time to get to know what people are saying about superwash, and what kinds of knowledge are out there. I came into this project hoping to know more about the technical side of superwash technology, but I’m finding that a good number of my questions come from the other side of the cloth, so to speak.
So, until we delve further into the environmental impact of superwash yarn, here are a few random thoughts on the significance of superwash wool (in no particular order of importance or certainty, riffing off your succinct pros and cons list, as well as opinions gleaned from various comment threads on the web, mixed with some of my own thoughts):
- It’s so readily available that it could be argued that it’s pushing natural yarn out of the market….according to the textile trade magazines, demand for manmade fabrics is on the rise
- Sometimes I think that superwash is more vibrant, and sometimes not. I’m going to have to do a dye test with both a superwash yarn and an untreated one in the dyepot at the same time to be sure
- One of the selling points of superwash early on must have been that it makes yarn softer & gets rid of the scratchiness, which was most likely true back when most wools felt like carpet wool. Nowadays there are so many fine wools…and the softness of suprwash feels more like a synthetic slickness to me.
- It’s not any more expensive at the retail-to-customer level, but what about the hidden or indirect environmental cost? There’s a term for that in business, but I can’t recall what it is at the moment. It might be mentioned in the video for The Story of Stuff, if I remember correctly…
- Apparently, superwash doesn’t have as much of that lovely “sheepy” smell. Nooooo!
- Also another good point raised somewhere: you can’t compost it, with the synthetic coating.
- Superwash treated yarns have less tensile strength, and absorb less moisture than natural wool.
- Apparently, also, the same resin treatment is used on paper towels? www.pburch.net/dyeing/dyeblog/C1307213733/E20091119090430/
- So, if the resin coating wears off after a while, does that mean that it adds to the microplastic problem I’m beginning to hear about lately in the world’s water systems?
- I’m seeing a lot of hesitation and fear of handwashing woolens, as if they’ll shrink up immediately upon contact with water to about a tenth of their original size…one commenter admitted feeling “heart palpitations” on the prospect of hand washing. Is this the result of over-effective marketing strategies on the part of the superwash contingent? (Not that I’m a conspiracy theorist or anything, but you gotta ask sometimes: who benefits from this way of thinking? Haha…) The truth is, you really do have to put in a bit of effort to felt something…and thing is, if we do wreck something, all we have to do is cut it up into squares for felted coasters, and our punishment is….we have to go knit some more. The horror. ;P
- Yarn construction could play a larger part in this issue. Merino 2-ply yarns are incredibly soft and appealing, but they are quite delicate, susceptible to abrasion, and easily felted. But people love them, so to compensate, they are superwash treated and have nylon added. However, when it comes to sock yarn, for example, a merino 2-ply has no business trying to be socks. Why not choose a wool that is more durable, such as BFL or Corriedale, or blend it with other durable natural fibres such as silk or mohair, and then give it 3 or 4 plies to make it last longer? A 2-ply merino should be kept for a beautiful lace shawl, which is where a 2-ply construction really shines, in which case, there is no need for either superwash treatment or nylon. (Gives me an idea on writing a post about sock yarn construction for durability. Or just generally, alternatives to superwash wool.)
- Since we’re not at a point yet where all yarns are labelled “treated/untreated”, making it difficult to make better purchasing choices, I’m having success if I look for breed specific wools (somewhat less likely to be superwash), or indirectly, looking for “hand wash only” or “good for felting” in the descriptions of yarns, which usually means that it is non-superwash.
- No matter what, we don’t have to panic or start feeling bad if we have superwash in our stashes, or if we occasionally buy it in the future…Better, not perfect is the goal here, and for the love of macaroni, don’t throw out the superwash (saw this in a comment somewhere) and go buy new untreated stuff! Totally counterproductive, environmentally, haha. 🙂 (I think I might do a post at some point about environmental implications of crafting choices, as well as guarding against “green-washing”. Like your set of criteria for using superwash yarn, I have a set of shopping criteria…a sort of consumer pyramid, that I should do a post about as well….)
- It’s ironic that hand washing makes your superwash yarn last longer. (Plus, I totally hear you on the joy of handwashing–getting reacquainted with each piece and recalling the pleasure of creating it as you rinse it and block it….)
- I love that you have a specific set of criteria to avoid laundering often. In this day and age of hyper-cleanliness, it is almost blasphemy to say, but I also think that we don’t need to do as much laundry as soap companies’ commercials lead us to believe 🙂
- Food for thought: an implication of choosing non superwash is that you might have to embrace “slow craft” and become comfortable with making fewer things. If you have superwash you have time to wash 40 things at once, maybe with natural yarn, you only can wash a handful in the same time. Hand-washing isn’t really more difficult, it just takes more time, which can lead us to more mindful craft, and our ability to be satisfied with less. I think we often choose to craft for these reasons, but we can also apply these mindsets to our crafting choices, as well.
- We can all avoid buying superwash for at least one reason: knitting for others who don’t know how to care for knits. Join the Selfish Knitters group on Ravelry, and knit only for yourself. Then you can be sure that the recipient is totally knit-worthy. Just kidding! (Sort of.)
- Every once in a while, instead of choosing to buy an untreated yarn instead of a superwash….choose not to buy any yarn. Stash dive, reclaim a knitted item you don’t wear much, or found at the thrift shop, use scraps, frog your UFO’s, do a destash trade, knit with some leftover spaghetti or electrical cord, etc. (See, now I’m getting into the topic of crafting choices, which I should save for a later point. I think once we have fully explored all the topics related to superwash, I will go back and do a summary post of all the main learnings.)
So that is my rambling, sort of unfocused response to your Part 1, some points more or less informed, and some points more or less serious 🙂
Part 2: I didn’t intend for you to go to the trouble of answering all those questions right away! They were just some interesting questions I hope to touch on over the course of these woolversations 🙂 I think we’ll need more time (probably after the holidays) to do some more in-depth research on environmental impacts, so in the meantime, I’d love to hear your response to some of the wacky things I put forward in this post 🙂 And Part 3 is absolutely fabulous, a fantastic start to what I hope will become a long and comprehensive resource for the mindful knitter. (Looks like I have lots of podcasts to check out!)
So now, I hope you forgive me for messing up your marketing/blogging schedule…and now I can hop over to Instagram and comment on all the interesting things you’ve been doing lately. Are you planning on telling us more about your new studio?